Table of Contents
Solve high CPU usage by Sppsvc.exe issue
If you have a habit inspecting your Task Manager once a day or every few hours to pinpoint any dubious task, Sppsvc.exe might definitely attract your attention. You might become suspicious of it especially when its CPU usage suddenly rockets to 30%.

If you have already read multiple articles about malware disguising under legitimate system files, the menacing thought might cross your mind that it is actually a virus. Let me dispel your doubts.
Sppsvc.exe: determining its origin
Sppsvc.exe stands for Software Protection Platform Service. It is legitimate process issued by Microsoft to maintain startup processes. In addition, to this, the command is an integral part of Windows activation process.
For instance, if the value of this command is altered, you might get an error message that Windows activation failed. If this executable still bothers you, note that several processes constitute it. In other words, you can expand its process in the Task Manager, you may find that several commands run within it. Likewise, you may disable only few of them for Sppsvc.exe to use less energy.
If you are still determined to end it, note that it is a constituent part of Windows processes[1]. Changing it might lead to system failure. On the other hand, some users[2] report that excessive CPU usage is what led Sppsvc.exe crash Windows. If that is the case, follow below instructions.
Option 1. Disable SvcRestartTask command
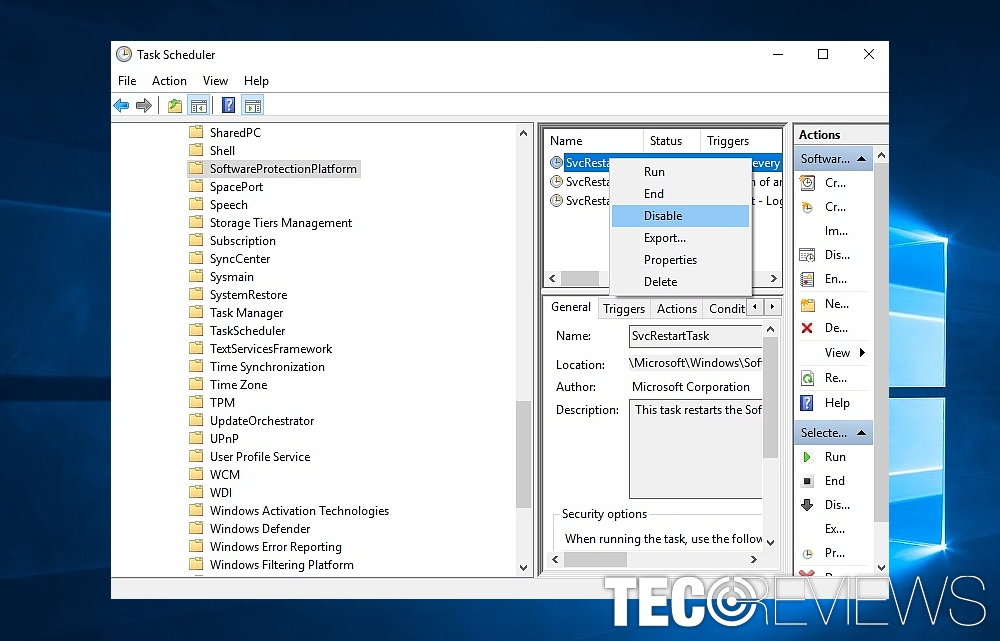
The picture illustrating Windows Administrative Tool.
- Click on the Start button and go to Open Control Panel.
- Type in the search box or empty space (in Windows 10) Administrative Tool.
- Choose schedule tasks.
- Enter Task Scheduler Library, then Microsoft, Windows, and finally SoftwareProtectionPlatform.
- Once you open it, find SvcRestartTask, right-click on it and choose Disable.
- In case there are two or more such processes, delete the duplicates.[3].
Option 2. Check Windows Updates
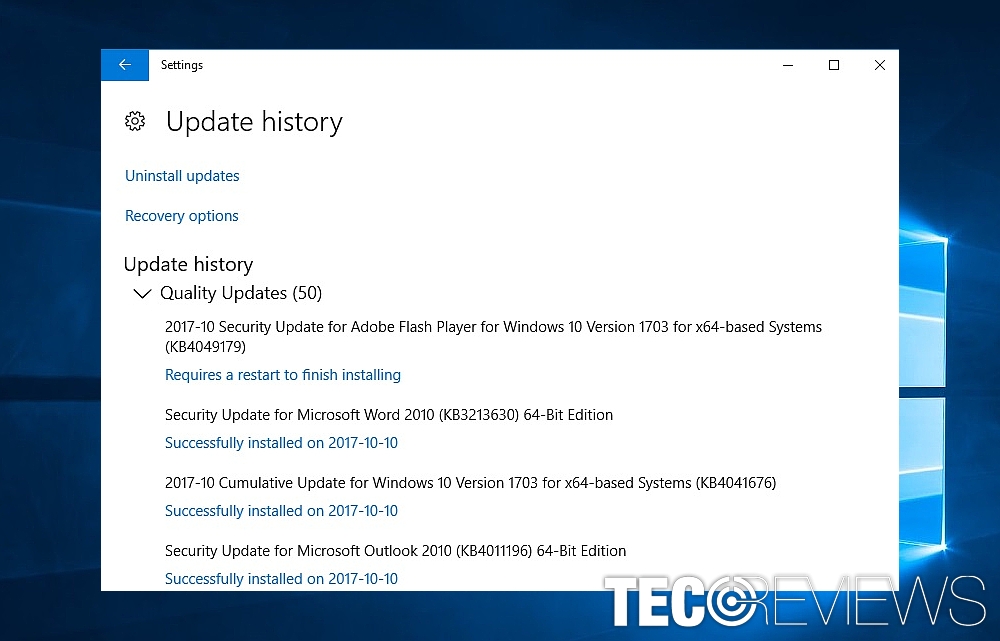
The screenshot of Windows Update history.
Check whether the latest updates were installed properly. Go to Update and Security settings via Control Panel. In Windows 10, opt for Update history and check the status of currently installed (or failed) updates. Reinstall them again, if necessary.
Option 3. Make sure your Windows is malware-free
While the process suggests Windows process running, it is not a completely surreal scenario that malware might infiltrate the system disguising under this executable file. Run scans with your anti-virus and malware removal tools to make sure no malware resides on the system.
You might spot that some sources[4] and users suggest altering the value of Sppsvc.exe registry key to 4. While it worked out for some, some users complained that this change resulted in the errors urging to validate Windows.
In case you changed the value and now forgot the path to the registry entry, here are the steps to revert it:
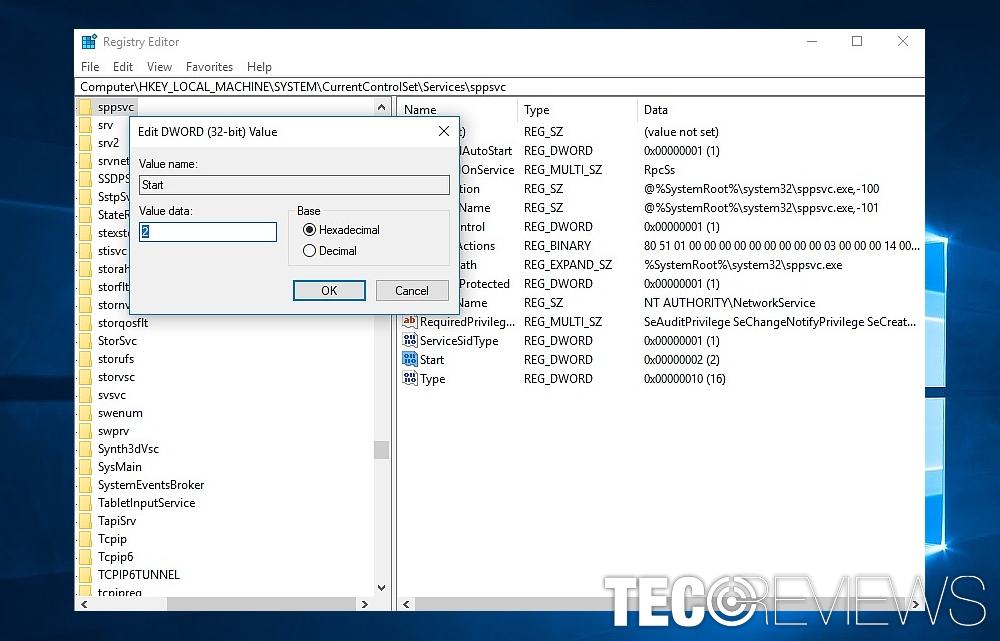
Change Start file value to 2.
- Click on Windows+R and type regedit. Press Enter.
- Once Registry Editor launches, go to the following location: HKLM\SYSTEM\CurrentControlSet\Services\sppsvc
- Find Start file, right-click and change the number to 2 in the Value data box. Click OK. Restart the system, if necessary.
COMMENTS